
Running A Frame - "Nerd Box"
07 May 2013
I’m using Rachel Sanders’ running A Frame technique with Flyer and I thought I’d share my “Nerd Box” design with you. I came up with this design many years ago with Meeker and never got around to sharing it. I think my design has some benefits over the traditional designs I’ve seen.
Most folks follow Rachel’s original box design using a 3/4” PVC “box” with 3-way corners and small bungee cords or straps to attach the box to the A Frame. I build mine out of smaller diameter 1/2” PVC using “T” connectors, some 90 degree corners and short PVC feet. This design makes this box:
- Height adjustable on the ground and on the A Frame.
- Instantly installed with spring clamps on A Frames with welded support frames.
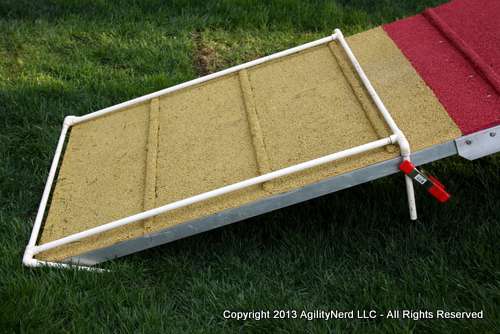
Box Clamped on A Frame
Here are some notes on how I build it and use it in training.
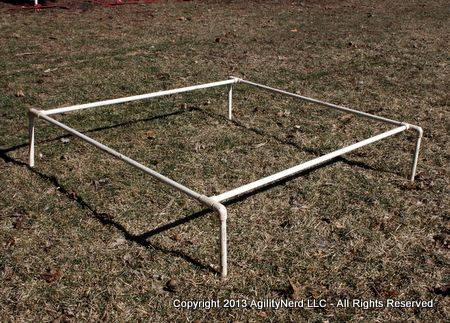
Building The Box
I don’t have hard and fast dimensions for building the “Nerd Box”. I start with two 10’ lengths of 1/2” PVC pipe. The width of the assembled box should be just slightly smaller than the width of A Frame. The feet are attached to the corners of the box and you want them to be flush with the edges of the A Frame so the box doesn’t bow upward when you clamp the box to the A Frame. If you look at the following photos it should all make sense.
No glue is used in assembly - everything is friction fit.
I cut the horizontal pieces to 36” to start and then cut off 1” pieces to connect the 90 degree angles to the ends of the “T” sections. I then see how much the width is too wide and cut off some of what remains of the 36” length until the assembly’s width is snug on the A Frame.
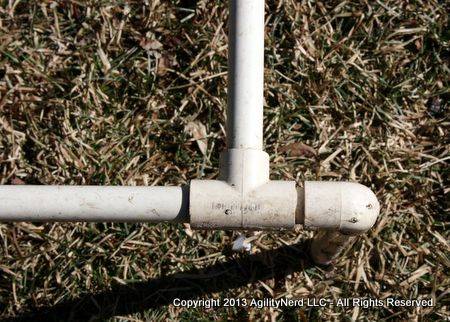
Box Corner
Box Corner Disassembled
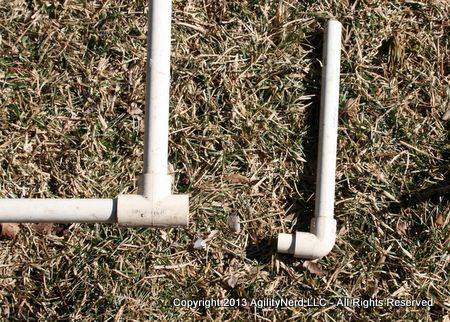
The feet that go into the other end of the 90 degree angles are left over tubing around 6” long.
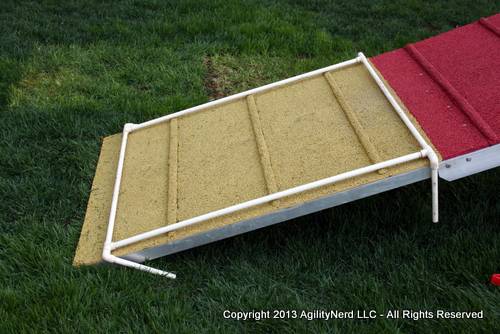
The length of the box is normally just slightly smaller than the length of the contact area (42 in). I prefer to make mine even smaller to aim at getting my dog to reach further for the yellow area. I think this one has 36” tubes - so with the T’s installed it is more like 38” long.
Box Length Compared to Contact Area
This isn’t rocket science and the 1/2 PVC is cheap and easy to cut so feel free to experiment.
Starting Training on the Flat
One benefit of my design is it allows the height of the box to be adjustable during initial training on the flat. You want the dog to “pounce” in and out of the box. At first I rotate the feet to be almost vertical giving my dog a clear “bar” to jump over going in and out of the box.
Box Full Height on Ground
You can then rotate the feet to lower the box until it is flat on the ground. The snugness of the short 1” stub of tubing in the T fitting is what keeps the box at it’s height - but allows it to collapse easily if the dog steps on it. If the feet ever rotate too easily just rough up the surface of the short stub by grabbing it with a pair of plyers and twisting a little.
Box Half Height on Ground

Since you can rotate the feet independently you can easily have one side higher than the other. I needed to do this on the far end of the box when introducing grids in order to convince Flyer to jump into the box rather than jumping over it entirely.
Training on the A Frame
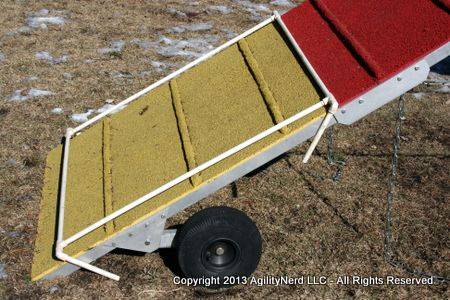
When you are ready to move the box to a low A Frame you can just rest the box on the frame and adjust the feet to locate it vertically on the contact area. As you raise the A Frame use one or two spring clamps to pinch the top feet to the aluminum frame under the A Frame surface.
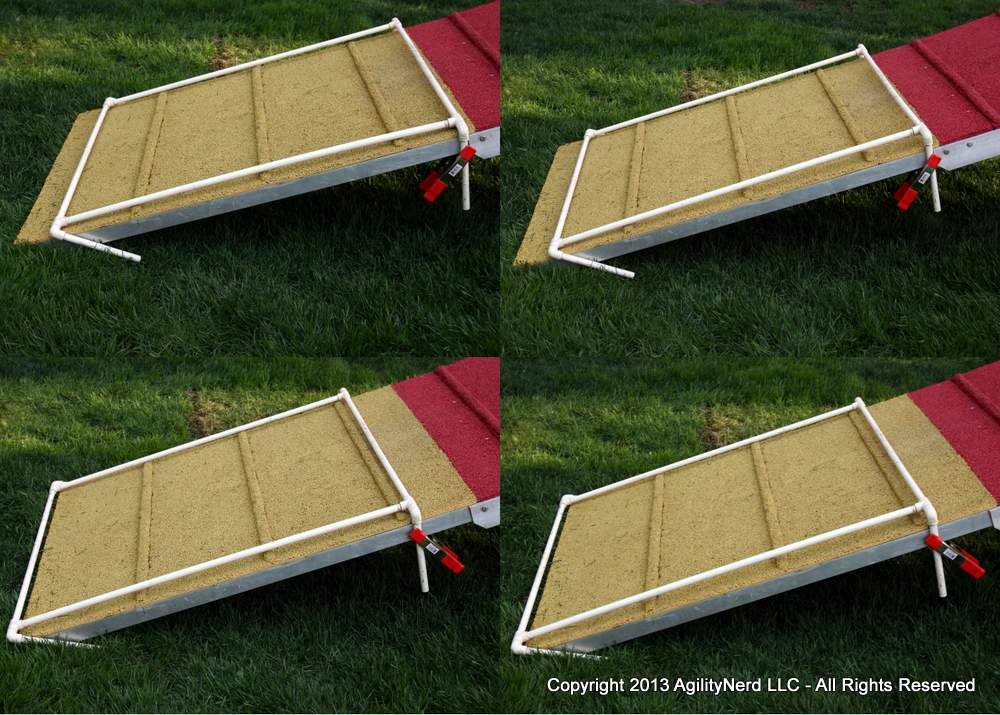
Box Resting on Lowered A Frame
You can clamp the box flush to the surface or raise it slightly to make it more visible to the dog. The clamping approach also lets you slide the box up/down the surface of the A Frame to your preferred contact starting location. In this photo the left column shows the box lower in the yellow flush and below it raised above the surface. On the right the box is at the top of the yellow and flush/raised.
When it come time to fade the top bar of the box you can still cut it apart in the middle and the clamps keep the remainder of the box in place.
I also think the thinner tubing makes this fading easier. But you could use this same design with 3/4 inch PVC.
That’s all there is to building and using the “Nerd Box” I hope you running A Framers found this design interesting! Let me know if you have any tips for building your own Rachel Sanders’ A Frame box.
If you enjoyed this article won't you please:  Thanks!