
Use Sight Lines to Accurately Setup/Build Agility Courses
01 Sep 2018
The “baseline” method of course building (Daisy Peel how to video, 2004 Clean Run article by Dave Hanson) is the most accurate way to set up agility equipment to match the designer/judges design. In a nutshell, you layout a long measuring tape down the middle of the course. For each obstacle you find it’s location along the tape and then use a measuring wheel or another tape measure to measure perpendicular to the tape to place the obstacle.
The baseline method gets you the center of the obstacles (and the ends of the weaves, tunnels and contacts if the course diagram comes from Clean Run Course Designer), but it won’t help you set the angle of the jumps correctly.
A solution I’ve learned and used is to look at the course map and find where you can connect two, three, or more jump standards with one another or another “landmark” on the course with a straight line. I call these lines “sight lines”. When you build the course you can check that the obstacles are located and rotated so they line up according to those sight lines. It’s just that easy!
Let’s see it in action. Here’s a course and we’ll imagine we’ve used the baseline method to put the obstacles in their locations.
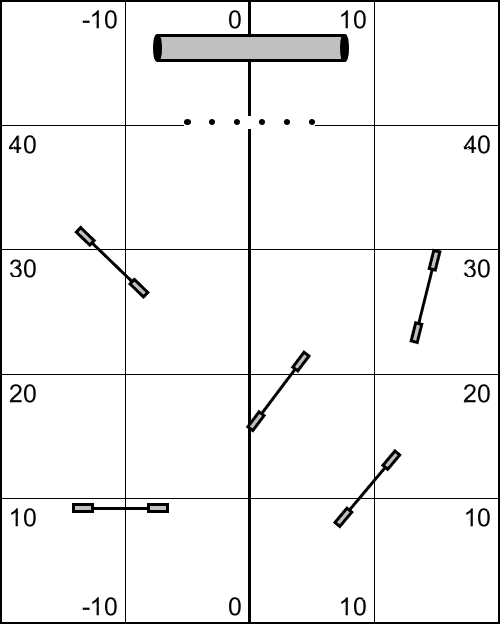
Before you read more! Take a moment and see if you can find some sight lines along the jumps.
Here are four sight lines I found when I looked at this course:
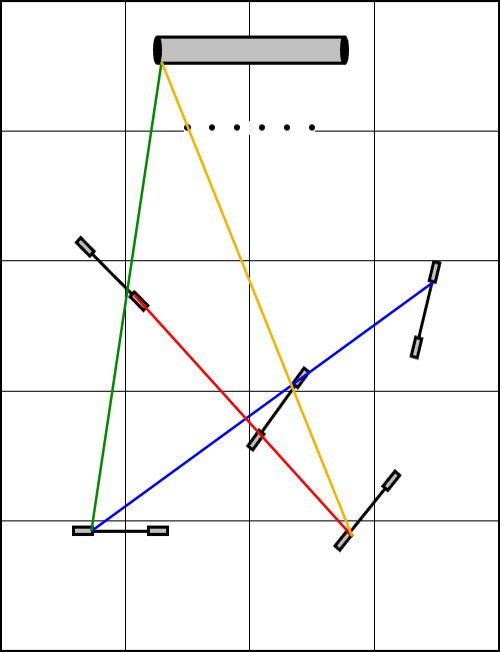
Sometimes you’ll need to be creative and use approximate location to make two to three points connect. Maybe two jump uprights line up with the end of the contact area on the A Frame, Dog Walk, or teeter; a specific weave pole or a post/number on a wall.
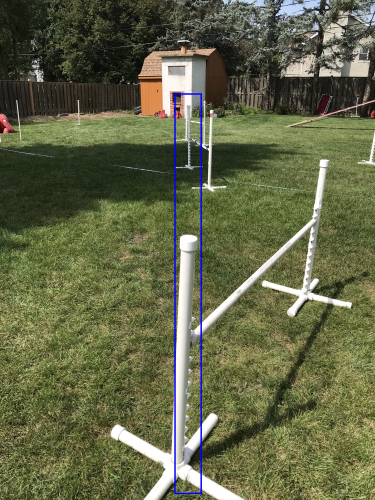
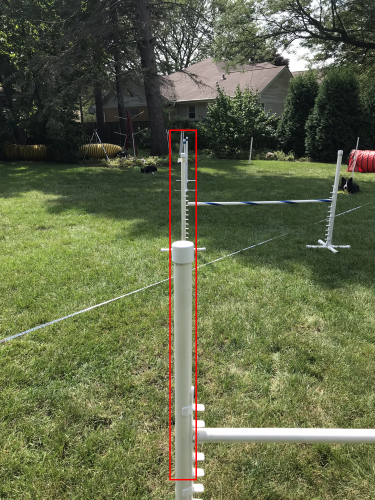
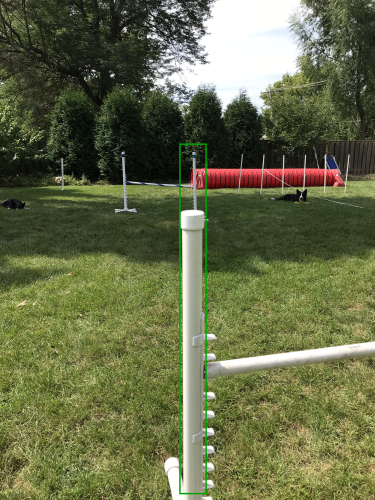
Don't despair if you don't see the lines on the map! You can work the other way instead. Sometimes it's easier to build the course and then look at the obstacles and actually see the sight lines. Then check the map to see if the lines you built are correct. Use what works for you!I set up this course in my backyard. Let’s see how well I did on three of the sight lines. When you see the jump standards all line up you know they are rotated as shown on the course map.
It’s that simple!
Oh! Another way to confirm obstacle alignments, when there are few good sight lines, is to hold the course diagram paper parallel to the ground, rotate it so it aligns with the course and the actual obstacles, and then bring it up to your eye. Then turn your body (keeping the paper aligned with the course) and look across the paper to the obstacles and see if the obstacle location/rotation you see on the paper matches the real obstacles.
If you enjoyed this article won't you please:  Thanks!