Flyball Training Progression
29 Dec 2006
I’ve been thinking about writing this up since before I started this blog. My Flyball training progression has been developed based on my exposure to a number of smart trainers and Flyball competitors and includes ideas I’ve found useful based on my experience. There are many other drills and especially other methods for working with the box (probably as many as there are teams and trainers), but these steps are what I use in my classes. As time goes on I hope to add specific articles describing some of the less obvious steps.
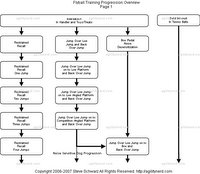
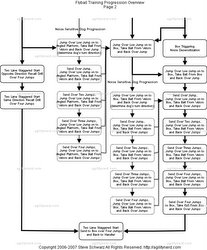
This is a skills progression diagram, it isn’t a class outline. That is, the training of each dog goes at the speed at which the dog learns not according to a fixed outline. Some dogs can get “stuck” at one or more points in the training and then it is up to the trainer to find a way to help the dog understand what you are asking. It still “lumps” together some skills more than I might in an actual class setting but it is already more complex looking than I would like.
The diagrams below shows the parallel paths that can be trained simultaneously. As a dog masters a skill in a column you move down that column to the next skill. Of course a dog will not progress in all columns at the same rate. But all columns can be trained simultaneously. As skills from two or more columns are combined the next skill will span those columns. So in other words, follow the arrows. In a class setting I’ll break up the class into time spent on each of the parallel paths based on the dog’s current skill levels.
I labeled two parallel paths for noise sensitive dogs. You could also use these paths for dogs that don’t like the box due to its pedal motion.
I mentioned an angled platform in the progression. I have built an adjustable angle 24 inch by 24 inch platform that I have covered with flyball matting that I use to get dogs comfortable with the jumping/turning mechanics of the box without the noise and motion of the box pedal and/or triggering sound. This is also known as an adjustable “slant board”. It is about the same size as a competition box and lets me continue training dogs and building their confidence if they are worried about the actual competition box. I also use a 24 inch by 36 inch matted platform that I clamp onto this slant board for training larger/longer dogs. I’ll remove this larger size platform as the dogs learn where their feet are in relation to the box.
When it comes time to introduce the ball on the slant board or box I have a long piece of Velcro sewn into a loop with some elastic that I wrap around the platform or the box. The hooks on the Velcro are sufficient to hold the ball in position on the box in the same location it would be if the dog grabbed the ball from the hole. You really want to teach the dog to put their mouth right over the ball rather than catching the ball on the fly as it reduces bobbling of the ball (you’ll notice most new boxes leave the vast majority of the ball exposed on the face of the box for just this reason).
For anyone curious these diagrams were drawn with the Open Source program Dia and the watermarks and conversion to GIF file format were performed with the Open Source program ImageMagick. Thank you Open Source developers.
If you enjoyed this article won't you please:  Thanks!


